Saturday, 9 June 2012

HOW TO ADD MAC FILE BROWSER TO WINDOWS

FINDER CLONES & LOOK ALIKE    FILE BROWSERS FOR WINDOWS

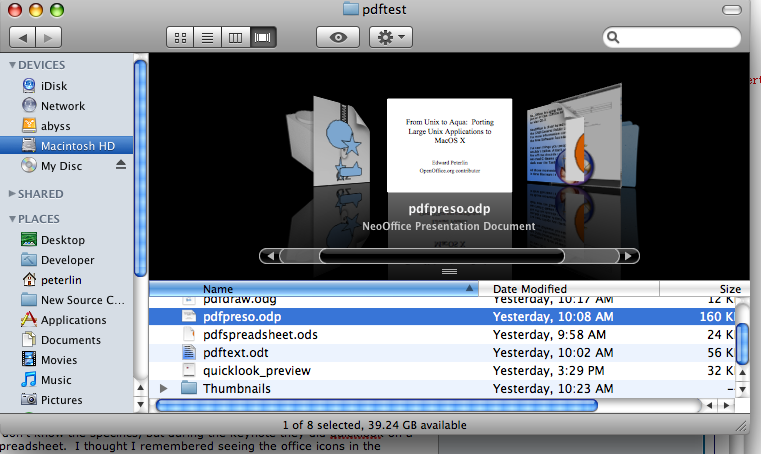
windows explorer or mac os finder? i will say finder,it work awesome, it look awesome,it feel awesome
one thing is that wont work in windows!!but most of the people are not ready to buy a macbook only for os x.what ever we have similar softwares .It is not that awesome but it does the job.im talking about a FINGER XPsounds even like finder

FINGER XP

NOT FINGERXP this is the real finder


download finger xp

Tuesday, 22 May 2012

How to add mac os launchpad to windows

XLAUNCHPAD

Xlaunchpad is from the guys who made the wonderful  app Xwidget.It work like Mac os x launchpad and giving you the chance to experience  mac launchpad . like they say "xlaunchpad is an app that work like mac launchpad on windows.XLaunchpad gives you instant access to all your shortcuts.Arrange apps in XLaunchpad any way you like by dragging icons to different locations or by grouping apps in folders. Simply drag one icon over another to create a folder. you can name the folder whatever you like when you open the folder."

you can customize caption font,icons,blur,icon spacing etc,etc...
it mean  Xlaunchpad will work the way you like .

download  xlaunchpad from Xwidget.com

You can download icons for xlaunchpad from:


How ever i was looking for an app just like this ,because i was thinking  "why mac os have all the good stuff?" 

xlaunchpad

xlaunchpad settings
launchpad on mac


Xlaunchpad on windows 7

Wednesday, 16 May 2012

How to improve gaming

Game booster

No graphics card ??stuck with low frame rate??
don't  worry..
one click  to boost and restore
game booster can help you to improve your gaming experience..But i doesn't mean you can get gaming experience with a GPU.

Game Booster 3 is capable of delivering the best gaming experience to you even if you have an old PC. One-click to boost PC performance is not enough, Game Booster 3 also allows you to tweak your system for top PC performance. By temporarily shutting background processes and unnecessary Windows services, cleaning RAM, and intensifying processor performance, Game Booster 3 concentrates every little system resource for gaming only.

Game Booster 3 is compatible with PunkBuster, Cheating-Death, VAC, and any other anti-cheat software.
Click here to download for free

Key Benefits in Game Booster 3.4.0

[+] See all1-Click Boosting Game Performance EnhancedGame Booster v3 can easily and fast-close background processes and unnecessary Windows services, to speed up your game playing and avoid possible conflicts and incompatibility. With the innovative "Enhanced 3rd parties' services detection" technology, Game Booster v3 can automatically detect and close more unnecessary background services.Pure Gaming Environment with "Game Desktop" New!Game Booster 3 now is able to provide you a pure "gaming environment" that leaves only the gaming window on the desktop; thus you will not be disturbed by other programs during your gaming.Tweaks System for Top PC Performance EnhancedGame Booster v3 can tweak your PC for the ultimate system and Internet speed with a single click.Create Your Own Game Box EnhancedAdd and manage your games in a game box and boost the game automatically with Game Booster 3 when launching.

Game Booster 3.4.0™ Product Specs
Current Version: 3.4.0
File Size: 4.15 MB
Operating System: Designed for Windows 8, Windows 7, Vista, XP and 2000
Release Date: Apr. 28, 2012
Designed to: Make your games run at peak performance.
Languages: Arabic, BrazilianPortuguese, Czech, Danish, Dutch, English, Finnish, French, German, Italian, Japanese, Korean, Norwegian, Persian, Polish, Russian, Slovenian, Spanish, Swedish, Turkish, ChineseSimp, ChineseTrad,Serbian(cyrillic), Serbian(latin),Greek, Hungarian.

Free DownloadClick here to download for free!

Friday, 11 May 2012

How to keep your software stay updated

FILEHIPPO UPDATE CHECKER


update page
filehippo update Checker is a small program that  scan your computer for installed software, check the versions and then send this information to FileHippo.com to see if there are any newer releases. These are then neatly displayed in your browser for you to download. Please note that not all programs are supported
.
Update Notifications
To download go to
But it gets better...
The client is FREE, just over 200kb to download and only takes seconds to run! In fact on our test machines the process is complete in under 2 seconds!

What are the requirements?
The Update Checker works on any PC running Windows 7, Vista, XP, 2003, 2000, ME or 98.
It requires that the Microsoft .NET Framework 2.0 is installed, which you may download directly from here, or the installer will prompt and download it automatically.

Changes
Version 1.039
Three new languages: German, French and Italian.
Version 1.038
Improved for .NET 4.0 compatibility.
Version 1.037
Multi-language support.
Version 1.036
Performance improved.
Version 1.035
Internal performance improvements.
Version 1.034
Fixed updates count shown in bubble when UDC is minimized to tray.
Version 1.033
Release version.
Version 1.032
Improved program compatibility.
Version 1.031
Improved program support and scanning methods.
Version 1.030
Compatibility fixes and better proxy support.
Version 1.029
Minor bug fixes and Google Chrome support.
Version 1.028
Fixes for non-English systems and permissions changes. 

Privacy Policy


The Update Checker will not send any personal information back to FileHippo.com. The only information collected is a list of programs and their versions, along with the operating system details to help with processing. Additionally none of this is linked to your IP address and the logs are deleted after processing.


curtsy filehippo.com

Thursday, 19 April 2012

How to arrange desktop icons

                                  FENCES


Is a program that helps you organize your desktop and can hide your icons when they are not in use.
your desktop by creating shaded areas which become movable and sizable containers for your icons. Double click blank spaces on your desktop and all your fences will fade out, and back.
"It wasn't five minutes after installing Fences that I realized I'd be using it for the rest of my computing life. It's that good." - PC World

watch it in action
Create an unlimited number of Fence areas on your desktop
Quickly hide/show your desktop icons with a double click
Patent Pending
Customize the color and opacity of your fences
Low profile, low system impact: Integrates tightly and cleanly with OS

Fences explained by screenshots


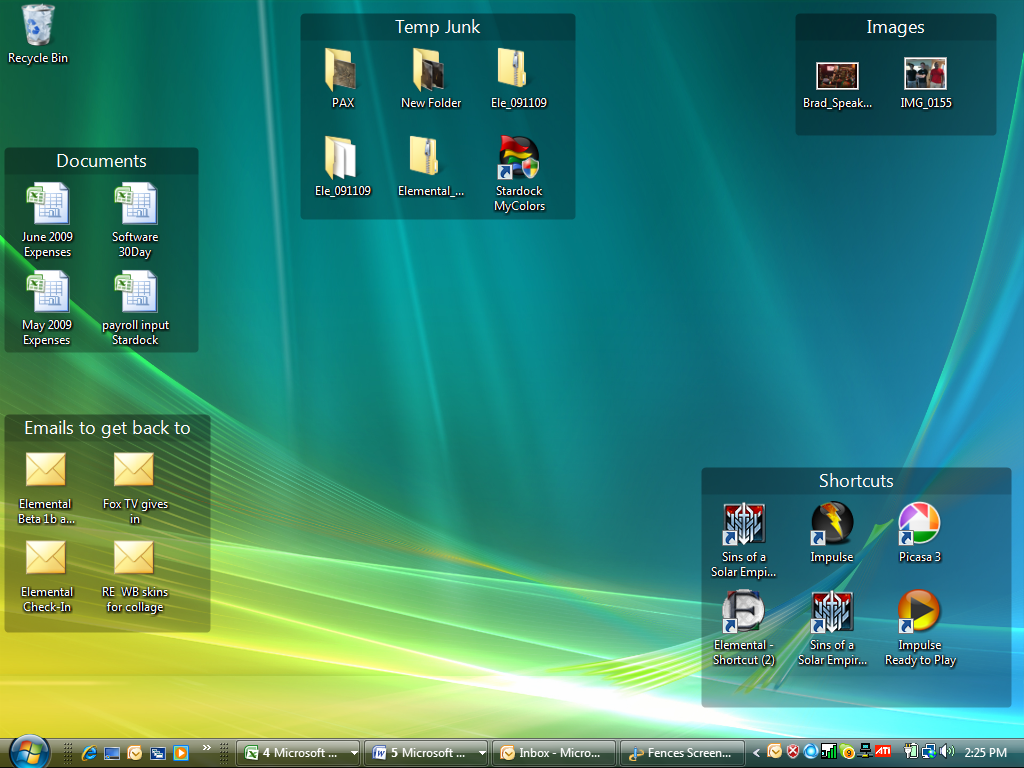
image
Organize your desktop icons by creating fences and moving your icons into them.

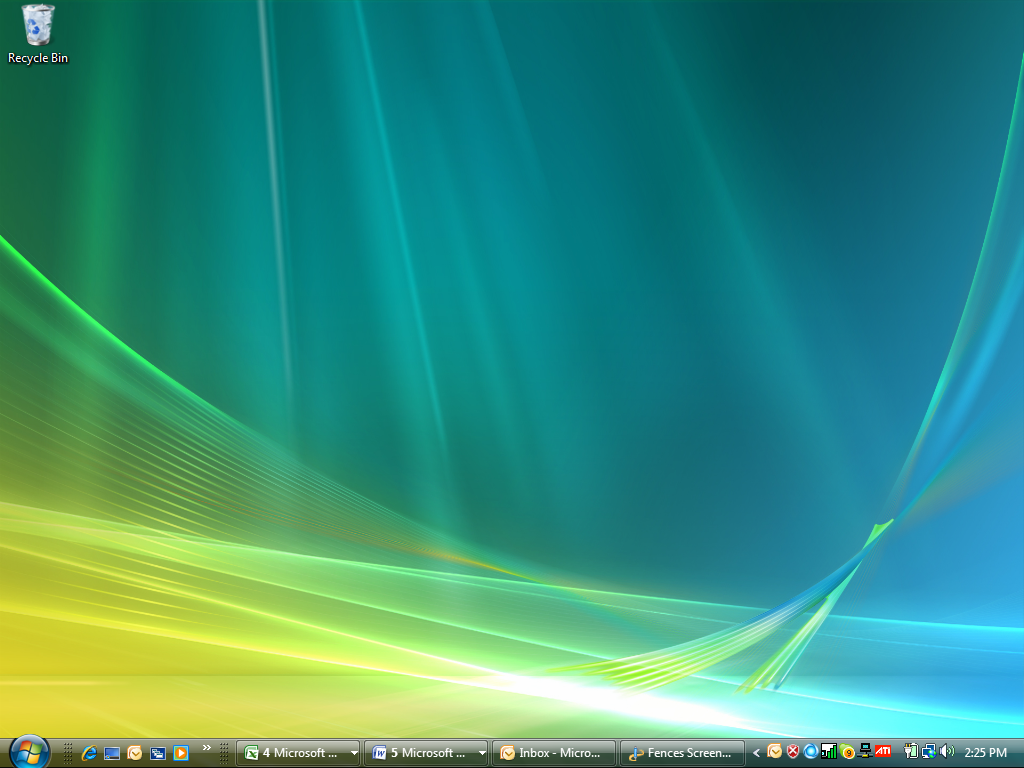
image
Double Click on the desktop and it will hide your desktop icons, double click again and they come back.

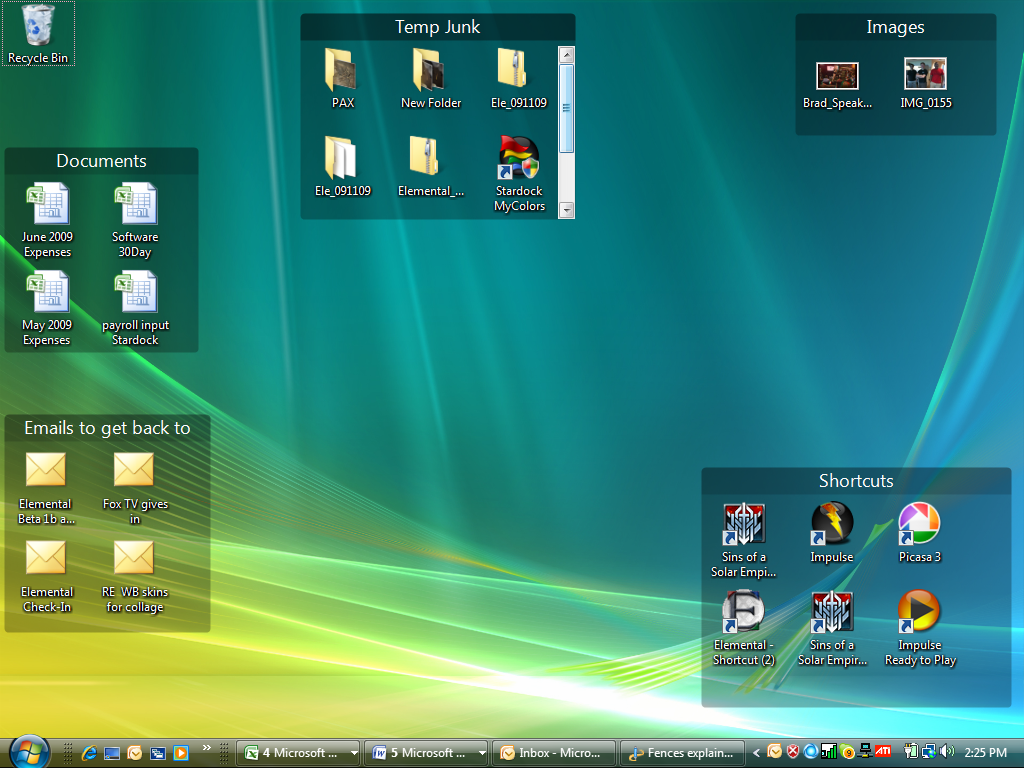
image
If you put your mouse over a particular fence (like Temp Junk) you can see all the other things in that fence that were hidden.

 NEW VERSION OF FENCES IS AVAILABLE  CLICK TO DOWNLOAD
NEW FEATURES
* Make Your Desktop a Portal to Your Files
- Expose folders containing documents or pictures onto your desktop in fenced areas making them easy to access.
* Multiple Desktop Pages
- You can now have multiple pages of fences on your desktop. To flip a page, just take your mouse cursor to the edge of your screen and click and drag a new page of fences onto your desktop.
# FEATURES
* Rope off Your Desktop
- Create shaded areas call fences on your desktop in which you can place and organize icons.
* Keep Your Desktop Clean
- Double-click blank space on your desktop and all of your icons will fade out. Double-click again and they will return.
* Automatically Arrange Your Desktop
- Define rules for where your icons are placed and how they are arranged. When a new icon gets added, from an installer for instance, it will be automatically added to your preferred fence.
# NEW * Make Your Desktop a Portal to Your Files - Expose folders containing documents or pictures onto your desktop in fenced areas making them easy to access. * Multiple Desktop Pages - You can now have multiple pages of fences on your desktop. To flip a page, just take your mouse cursor to the edge of your screen and click and drag a new page of fences onto your desktop. # FEATURES * Rope off Your Desktop - Create shaded areas call fences on your desktop in which you can place and organize icons. * Keep Your Desktop Clean - Double-click blank space on your desktop and all of your icons will fade out. Double-click again and they will return. * Automatically Arrange Your Desktop - Define rules for where your icons are placed and how they are arranged. When a new icon gets added, from an installer for instance, it will be automatically added to your preferred fence.


CURTSY Stardock Corporation. AND FROGBOY FOR SCREEN SHOTS

Tuesday, 17 April 2012

SWITCHER ON WINDOWS

SWITCHER
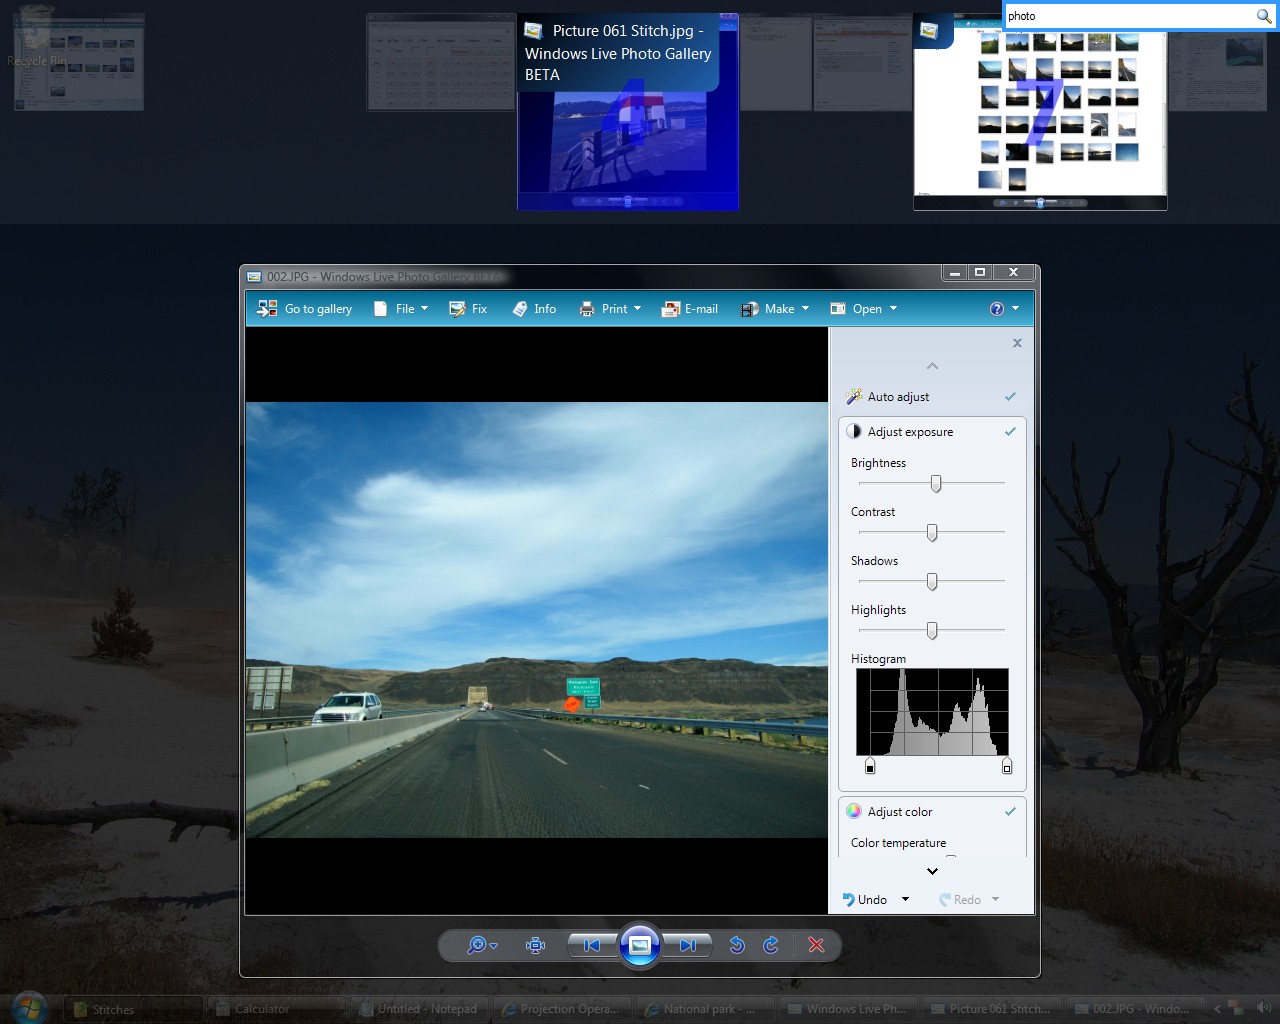
switcher on my desktop


ViewAll your windows. Three ways to see them: dock, grid, andtile
FreeZero cost.
Lots of fun.


PersonalizeWhat's your favorite color? Switcher likes it too.

MultimonEnjoy with all your monitors. 

SearchQuickly find your application. Just start typing. 


ShortcutsWork faster. Customize the keyboard and mouse shortcuts to fit you. 


Download Switcher 2.0.0
Released 2007-10-28. Requires Windows Vista + Aero.
What's changed? | Non-installer download

AN OVERVIEW
Switcher puts you in control of your windows. See all your windows on one screen, quickly search through them, even decorate them with your favorite colors and fonts. Let's get started!

Installing and running Switcher

  1. Switcher requires Windows Vista and Aero. Click here to determine if you have Aero.
  2. Go to the Switcher home page.
  3. Click the Download Switcher link.
  4. When asked to run Run or Save, click Run.
    Running the Switcher installer
  5. Follow the installation instructions.
  6. When you're done, run Switcher from the Start menu.
    Starting Switcher
    After running Switcher for the first time, it will automatically start when you log on.

Switching between windows

  1. Once Switcher is running, make sure you have 2 or more windows open.
  2. Press Windows+~ to begin switching between windows.
    The ~ key is next to the Esc key. If you're using a non-US keyboard layout or find the ~ key difficult to press, see the Shortcuts section for information on changing this shortcut.
    You can also configure hot corners to switch between windows. See the Shortcuts section for more information.
  3. Use the arrow keys, Windows+~Windows+Shift+~, or the mouse to navigate between the windows.
  4. Press Page Up and Page Down to switch between views. There are three available views:
    • Dock view Dock view places all windows except the active one to the side.
    • Grid view Grid view arranges the windows into a grid.
    • Tile view Tile view shrinks the windows until you can see all of them.
  5. Activate a window by clicking it, pressing Enter, or pressing the number that appears on the window.

Search

Got a billion windows open? Here's how to find the window you need:
  1. Begin switching between windows.
  2. Start typing the text of the window you're trying to find. A search box will automatically appear, and the windows will move and hide themselves until only the ones matching your text appear.
    For example, if the window is titled Vacation Photographs, you can type either vacation or photo to find it.
    Search box

Settings

Switcher has many settings you can change to fit your needs.
  1. After running Switcher it'll place an icon in the taskbar:
    Switcher taskbar icon
  2. Double-click the icon to display Switcher settings.
    Switcher settings

Personalize

My favorite color is blue. Others like brown or orange. Instead of trying to be all those colors, Switcher lets you choose.
  1. Open Switcher settings.
  2. Click the Window Style section.
  3. Adjust fonts, colors, sizes, and positions however you like. A preview is displayed on the side.
    Window style settings
  4. Remember to also change the appearance of selected windows using the Window state combo box at the top.

Shortcuts

You can change all the keyboard and mouse shortcuts to what works best for you.
  1. Open Switcher settings.
  2. Click the Shortcuts section.
  3. Here you can directly change the keyboard and mouse shortcuts that begin Switcher.
    Shortcut settings
  4. To change other shortcuts, click Edit Shortcuts. The Switcher Shortcuts window will appear with a list of commands. Each command may be associated with several shortcuts.
    Shortcut settings
  5. Switcher supports three types of shortcuts: keyboard shorcuts, mouse shortcuts over the screen, and mouse shortcuts over windows. These are described in further detail below.

Keyboard shortcuts

These shorcuts are activated by pressing keys on your keyboard, for example Windows+~Ctrl+F, or even the arrow keys.
Keyboard shortcuts have the following options:
  • Global shortcut: When checked, indicates that the shortcut works when Switcher is not active.
  • Activate when shortcut is: Indicates when the associated command is triggered.
    • Pressed: The command is triggered when the key is pressed down.
    • Released: The command is triggered when the key is let go.
  • End session when shortcut is released: When checked, Switcher will end the session and select the active window when the keys are let go.

Mouse over screen shortcuts

These shorcuts are activated for mouse activity on the screen.
Mouse over screen shortcuts have the following options:
  • Activate when: Indicates the mouse activity that activates the shortcut.
    • Button is pressed: A mouse button is pressed down.
    • Button is released: A mouse button is let go.
    • Mouse has moved: The mouse cursor has moved across the screen.
    • Wheel has moved down: The mouse wheel has moved down.
    • Wheel has moved up: The mouse wheel has moved up.
  • Activate on: Restricts the shortcut to a certain monitor if you have multiple monitors.
  • Global shortcut: When checked, indicates that the shortcut works when Switcher is not active.
  • Screen corners and edges: Restricts the shortcut to certain corners and edges of the screen.
  • Mouse buttons: The mouse buttons that activate the shortcut. If multiple buttons are selected, any of the buttons will activate the shortcut.
  • Keyboard modifiers: The keyboard buttons that all must be pressed to activate the shortcut.

Mouse over window shortcuts

These shortcuts are activated when the mouse touches a window or the background during a session.
Mouse over window shortcuts have the following options:
  • Activate when: Same as mouse over screen shortcuts.
  • Activate when mouse is over:
    • Window: The shortcut activates when the mouse is over a window.
    • Background: The shortcut activates when the mouse is over the background, and not a window.
  • Mouse buttons: Same as mouse over screen shortcuts.
  • Keyboard modifiers: Same as mouse over screen shortcuts.


info curtsy  Bao Nguyen


Monday, 16 April 2012

Stacks on windows 7

 
7stacks is an easy to use, free app that lets Windows 7 (and Vista and XP) users have “stacks” of icons in their Taskbar (in 7) or QuickLaunch Toolbar (in Vista and XP). By using stacks, users canreduce icon clutter, and combine a group of related icons into a single icon. For instance, if you use application suites such as Microsoft Office, OpenOffice, or Adobe CS4, you can have all the suite’s icons combined into one icon!
You can also use it to browse and access documents within a folder very quickly. Usually, when you want to edit a series of frequently used documents, you’d have to either launch the app, and go to File|Open, or open the (My) Computer icon and go into your (My) Documents folder and pick the file you want. With 7stacks, just create a stack to that document’s folder, and open that document in a couple of clicks.
7stacks was created because of my own frustrations with Windows 7, as great an OS as Win7 is. Because Windows 7′s new taskbar, called the SuperBar is very similar to the Mac OS X Dock, many comparisons are going to be made. But Windows 7 seemed to have one glaring omission of OSX: stacks. Now, with 7stacks, you get almost the same functionality as the OS X stacks, but with a more “Windows 7″ appearance.
7stacks is incredibly easy to use, and has a variety of looks and features, allowing anyone to customize the look of their stack however they’d like. And using Windows 7, its easy to create new stacks by right-clicking on any stack, and selecting “Create New Stack” in the JumpList. 7stacks will place an shortcut icon on your desktop to this new stack, which you can then pin to your Windows 7 taskbar, or Vista or XP QuickLaunch bar.
7stacks even solves the problem other similar apps have had: forcing users to “hack” the executables and shortcuts to allow multiple stacks on the Windows 7 taskbar. 7stacks solves this by using 10 identical executables (numbered 0-9) and assigning the shortcuts slots based on which ones are used. The end result is that you can just pin up to 10 stacks on the taskbar, with no need to even think about hacking or reconfiguring or adjusting .. it just works!
Check out these features:
  • In 7 and Vista, 7stacks uses Aero, making the stacks look like part of Windows itself.
  • Browse subfolders within a stack, just like in OS X Snow Leopard.
  • 3 different styles of stacks: Normal, Grid, and Menu
    • Normal displays a stack of icons vertically, with a text description next to it.
    • Grid displays a “squarish” grid of icons only; useful when displaying a large number of items like document folders.
    • Menu displays a cascading menu of items, with a very small icon and a name next to it. Hover over subfolders to browse inside those folders.
  • In Windows 7, create a new stack by right-clicking on any stack and selecting “Create New Stack” from the JumpList entry.
  • In Menu mode, 7stacks doesn’t even need to be in a toolbar. You can use it right from your desktop, or any other folder.
  • Pin up to 10 different stacks on the Windows 7 taskbar   
DOWNLOAD STACKS
stacks on my desktop


browse folder and create desktop shortcut